Tuesday 27 August 2013
Monday 26 August 2013
M6 strategy
The mountains will represent the last letter of my name "M" and the 6 streams will represent the number.
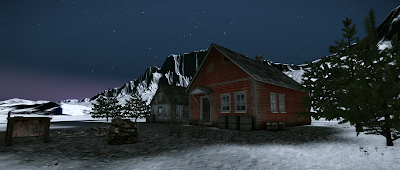
As i said earlier, i will create a snow mountain environment where there are lots of fogs snow falling down that portray wild and mysterious feelings and 5 different scales from macro to micro will have sublime to picturesque techniques that will show a combination of virtual and real environment with the use of details i have learned through tutorial videos.
The 50 word reflection of week4
This week of lecture, we were looking at the concept of sublime. The pictures and sceneries i was watching they were really mesmerising. The mood, unique colours they show, great environments made me realise again that the world is great. The Himalayas water towers inspired me that i wanted to create transcendental rocky snow mountains that no one could possibly dare to clime.
Monday 19 August 2013
The 50 word reflection of week3
First of all it was interesting looking at the landscape paintings of different artists back in the days. And it was very helpful and inspiring for creating my island through Repton's beautiful, picturesque and sublime guideline.
Monday 12 August 2013
The 50 word reflection of week2
This week we looked at the concept of Real vs Unreal. Eric Testroete's Paper craft Self Portrait was particularly interesting where he puts on his portrait paper crafted head on his body that gives a sense of both reality and virtuality. Also Antony Gormley's Domain Field was fascinating because he looked at things in a different way and materialises the place at the other side of appearance and that made real materials ironic.
5 reference images
sunlight on the mountain / shades perform distinctively and portrays freshness morning in spring
fogs and clouds with shimmering evasive purple lights at dusk in the mysterious snow mountain
The wild where the strong prey upon the weak. spiky environment and an ice cold weather
relaxing and peaceful landscape of the home town
calm waterfall, slow river, blue sky, green everywhere, Gods' resting place
Monday 5 August 2013
5 things i learned from each video
Getting started
1. executor file and editors in bin32, 64 and if your operating system is 64 bit, use 64 it's faster and it allows more memories.
2. if you know how to change code, you can go into code folder and manipulate them
3. shades, etc engine related files are in engine folder
4. In the game folder, there are files for sounds, animation, cgf files, materials..
5. when exporting plugins, make sure root directory is pointing to the build that i am using. when it turns to green it means compile textures
6. sdk.crydev.net photoshop plugin - bin32 - copy zlib1, jpeg62, libtiff3 and crytiff into root of photoshop file
Customising the editor
1. press m for material or an icon
2. to avoid many open windows, drag and drop one into another. it creats taps or use two screens or attach to side
3. turn off the tool bars
4. tools - customise keyboards - you can create your own toolbars dragging and dropping commands onto them.
5. customise - keyboards - hotkeys
6. tool - preferences - change interfaces high light geometry, pre visualise geometry, range
7. turn off sound and music
8. r_displayinfo 0
Viewports
1. alt - middle mouse roate round
2. go through terrain press Q
3. save camera tag position crtl f1 and go to the position shift f1
User interface panels - overview
1. select object, control + t. all the objects you can find it by name and filter it by geometry pak.
2. open asset browser with editor. browse objects, materials, textures and sounds. drag and drop.
3. database view, click DB. entity library.( physics, mass ). it is editable. vegetarian, particle effect.
4. lighting tool. time of day. sun direction, dawn time.
5. time of day, view - open view panel - time of day toggle advanced properties - environment of your level
Subscribe to:
Posts (Atom)


